- OVERVIEW
- PRODUCTS
- Featured Products
- Abrasives
- Adhesives, Coatings & Sealers
- Body Filler & Glazes
- Compounds, Polishes & Glazes
- Heavy Duty Truck
- Masking
- Paint Spray Equipment & PPS™
- Tools, Dust Extraction, Accessories
- View All Products
- APPLICATIONS
- Aluminum Shop
- Metal Shop
- Bumper & Plastic Repair
- Paint Finishing & Detail
- Corrosion Protection
- Paint Shop
- Glass Shop
- Seam Sealers & Coatings
- Heavy Duty Truck
- View All Applications
- SUPPORT

3M™ Perfect-It™ 1-Step Finishing System Standard Operating Procedure for Spot Repair
NEED HELP? ASK 3MStep by Step
-

Defect Removal
For paint finishes that contain minimal dirt defects and a texture that matches adjacent areas, the best way to remove defects is to sand the surface with a dual action sander equipped with the proper abrasive.
-

A 3-inch dual action sander is recommended for paint jobs with just a few small dirt defects that need to be removed. This keeps the repair area as small as possible.
-

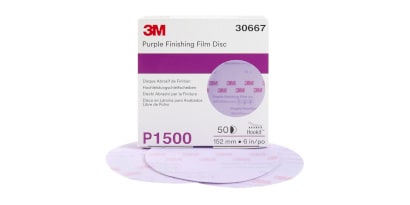
First, locate the paint defect that needs to be removed. Attach a 3-inch 3M™ Purple Finishing Film, Hookit™ P1500 or P2000 grade disc to a 3-inch dual action sander. A soft interface pad is recommended but not required.
-

Sand the defect until it is removed.
When all the defects have been removed, clean the sanding dust off the panel before moving to the next step.
-

Scratch Refinement
In this step you’re refining the sand scratches created by the P1500 or P2000 grade finishing film abrasives in the denibbing and texture matching step.
-

For spot repairs, a 3-inch dual action sander is recommended to keep the repair area as small as possible.
-

Using 3000-grade 3M™ Trizact™ Hookit™ Foam Abrasive Disc on a dual action sander with an interface pad, spray the disc and the surface to be sanded with water using a spray bottle. When using Trizact™ 3000, it is recommended to be used damp not wet.
-

Sand with medium pressure using 5-6 overlapping passes until a light slurry covers the repair area. Cross-sanding with the dual action sander creates a uniform finish.
-

Clean the surface with a microfiber towel and inspect the surface to ensure scratch refinement is complete. Once this initial scratch refinement step with Trizact™ 3000 is complete, you are now ready to move on to further refining the sand scratches in the next step.
-

Micro Scratch Refinement
To obtain the ultimate finish and eliminate the compounding step, scratch refinement with an 8000-grade 3M™ Trizact™ Hookit™ Foam Abrasive Disc is required. With this step you’re refining the sand scratches to the point where you actually begin to “polish” the paint, eliminating the need for compounding, which means no more compound swirl marks.
-

For spot repairs, using a 3-inch dual action sander is recommended to keep the repair area as small as possible.
-

Using Trizact™ 8000 on a dual action sander with an interface pad, spray the disc and the surface to be sanded with water using a spray bottle. When using Trizact™ 8000, it is recommended to be used damp not wet.
-

Sand with medium pressure using 5-6 overlapping passes until a light slurry covers the repair area.
-

Cross-sanding with the dual action sander creates a uniform finish.
-

Clean the surface with a clean microfiber towel and inspect the surface to ensure the scratch refinement is complete. Once this initial scratch refinement is complete, you are now ready to move on to the polishing step.
-

Polishing
The most unique aspect of Trizact™ 8000 is that it eliminates the need to use rubbing compound. Your only polishing step is with 3M™ Perfect-It™ 1-Step Finishing Material and the 3M™ Perfect-It™ 1-Step Foam Finishing Pad.
-

Attach a purple 4-inch 3M™ Perfect-It™ 1-Step Foam Finishing Pad to a 3-inch polisher.
-

Apply a small amount of 3M™ Perfect-It™ 1-Step Finishing Material to the pad.
-

Polish with medium pressure until desired result is achieved.
-

Remove any residual polish off the panel using a clean microfiber cloth and inspect to ensure the finish is perfect. Reapply polish and continue buffing as needed.
Product Spotlight
-

3M™ Perfect-It™ 1-Step Paint Finishing System
Get a deeper, glossier finish without the mess, the stress or the rework of compounding. Our new system features 3M™ Trizact™ abrasive discs and sheets in an extremely fine 8000 grade – the first of its kind in paint finishing. Trizact™ 8000 removes very fine defects in painted surfaces, taking the place of compounding. Follow with our specially formulated 3M™ Perfect-It™ 1-Step Finishing Material and purple 3M™ Perfect-It™ 1-Step Foam Finishing Pad, which deliver the cut of compounding with the fine finish of polishing.


